Wednesday, May 24, 2023

Get fired up for grilling season with these recipes and tips - Star Tribune

Grilling, with its sizzle and scent of smoke, makes for the ultimate quick and easy summer meal. Since the flames flavor the meat, I like to skip the messy marinades and season the food to taste after it's cooked.

There are a few key tips when it comes to grilling meat. And it starts with choosing good meat that comes from animals raised with care.

Grass-fed animals tend to be leaner, and their meat is full of flavor that is often described as "mineral," or deep and old-fashioned, with a nice firm chew. Thanks to the naturally nutrient-dense diet that these animals eat, the meat is loaded with high levels of omega 3 fatty acids and vitamin D. Plus, it's low-fat and high-protein.

Animals raised outside in the sun and fresh air are simply healthier and free from antibiotics used to prevent illnesses and hormones to boost weight gain. Plus, this style of managed grazing is an important component of regenerative farming, which is essential to maintaining fertile soil.

When it's close to dinnertime, follow these best grilling practices:

• Pat the meat dry with paper towels, then let it come to room temperature until you're ready to cook.

• Get one side of the grill glowing hot but leave the other side a little cooler, creating two temperature zones so food can be moved back and forth between them.

• Be sure to clean the grates with a grill brush (it's easier when the grill is hot) and then brush the grill grates and the meat with oil to prevent sticking and to encourage browning.

• Grilling is an inexact method, so follow the flames — not the cooking times in a recipe. Try to grill the meat over direct heat until the underside no longer sticks to the grate and releases naturally. Then flip, turn and cook until the other side is speckled with char and the meat registers doneness on a meat thermometer. If it needs more time, move the meat to the cooler part of the grill.

• After the meat has cooked, let it rest so the juices stay intact. Then dress it up with a bold sauce, an intense spice mix, a dab of herb butter or a snappy vinaigrette (see recipes).

Just knowing the benefits of grass-fed meat — better taste, more nutrition, a cleaner environment, improved soil health — and how to properly prepare it increases the pleasures of cooking outside on the grill.

Steak and White Bean Salad with Blistered Tomatoes

Serves 2.

Creamy white beans pair beautifully with the boldly seasoned steak while the blistered tomatoes give this salad color and snap. This recipe is easily doubled. From Beth Dooley.

• 1 pint cherry tomatoes

• 2 tbsp. extra-virgin olive oil, plus more for tossing with the tomatoes

• 1 tbsp. red wine vinegar

• 1/2 tsp. chopped fresh rosemary

• 1/2 tsp. Dijon mustard

• Salt and freshly ground black pepper, to taste

• 3 c. arugula

• 1/2 lb. cooked steak, sliced thin

• 1 c. cooked or canned cannellini or navy beans, drained and rinsed

Directions

Preheat the oven to 400 degrees. Scatter the tomatoes on a baking sheet and drizzle with just enough of the olive oil to lightly coat. Roast the tomatoes until they burst and their skins darken, about 15 to 20 minutes, shaking the pan occasionally.

Put the olive oil, vinegar, rosemary and mustard into a small jar with a lid. Shake vigorously. Season with salt and pepper to taste.

Arrange the arugula on individual plates, then add the beans, steak and cherry tomatoes. Drizzle the vinaigrette over all. Taste and adjust the seasonings.

T-Bone Steak with Worcestershire-Herb Compound Butter

Serves 4.

Here's a luxurious finish to this luxurious cut of beef — T-bone. Make sure it's well marbled, dry-aged and thick, about 1 1/2 to 2 inches high. Choose the USDA "Prime" grade for best quality. No need to prep the meat, just sprinkle with coarse salt about 40 minutes before cooking. This draws out the moisture and breaks down muscle fibers. Right before grilling, grind pepper over the steak to give it a sharp, crunchy crust. You'll end up with more compound butter than you need, but its brawny flavor is perfect on chicken and burgers, too. From Beth Dooley.

• 1/2 c. (1 stick) unsalted butter

• 1 tbsp. chopped fresh thyme

• 1 tbsp. chopped fresh parsley

• 1 clove garlic, grated

• 2 tsp. Worcestershire sauce

• Grated zest of 1 lemon

• 2 (1 1/2-inch-thick) bone in T-bone steaks, about 1 1/4 lb. each

• Coarse or kosher salt

• Extra-virgin olive oil

• Freshly ground black pepper

Directions

In a small bowl, smash together the butter, thyme, parsley, garlic, Worcestershire sauce and lemon zest. Taste, adjust the seasonings and spoon the butter into a small crock and set aside.

About 30 minutes before grilling, sprinkle both sides of the steak with the salt.

Heat a grill until very hot. Brush the steaks with the oil and then the coarsely ground black pepper. Place the steaks on the grill and turn every 30 seconds for about 1 to 2 minutes to develop a good firm char. Then, move the steaks to the cooler part of the grill and continue cooking until medium-rare, 120 to 125 degrees on a meat thermometer.

Remove the steaks to a platter and immediately spread about 1 to 2 tablespoons of the compound butter over them. Allow steaks to rest about 10 minutes before cutting across the grain for serving.

Grilled Pork Belly with Asian Glaze

Serves 4 to 6.

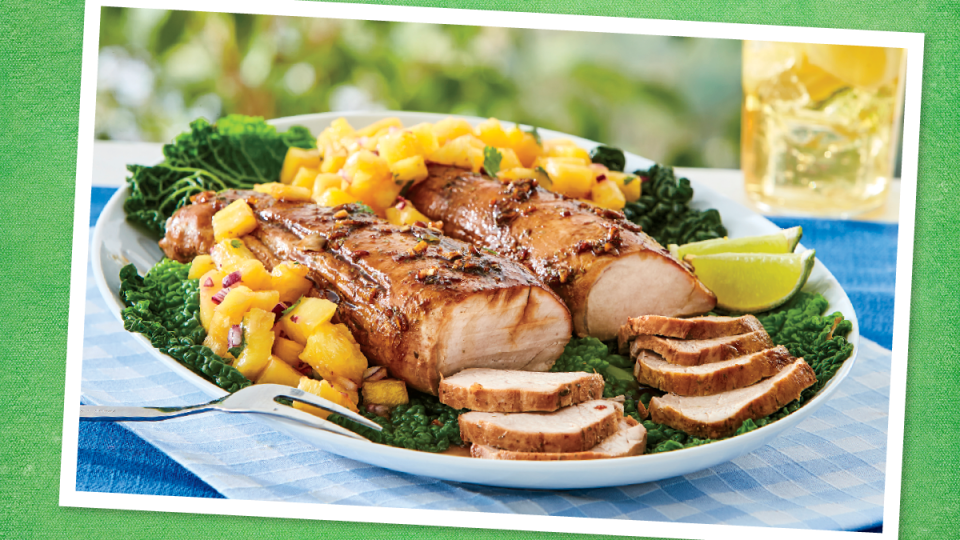
Pork belly is flavorful, rich and finger-licking fabulous. It can be tricky to cook on a grill, thanks to the luscious fat that tends to flare up. The trick is to use the two-zone grilling method so that the edges become crispy and the meat becomes tender. Serve this on soft buns topped with spicy coleslaw or just with a light noodle salad. From Beth Dooley.

• 2 tbsp. soy sauce

• 1/4 c. honey

• 1 tsp. freshly grated ginger

• 2 to 2 1/2 lb. pork belly, cut into 1/2-in. strips

• Coarse salt

Directions

Put the soy sauce, honey and ginger into a small jar and shake to combine.

Lightly season the pork belly with salt. Heat the grill to high. Place the pork belly over the hot side of the grill, being cautious about the flareups, and cook just 1 minute per side to develop some color, then move the pieces to the cooler side of the grill. Close the lid and cook for 1 minute. Flip and baste the pork belly pieces with the sauce every 4 to 7 minutes, keeping the lid closed between flips until the pork belly is thoroughly cooked through, 145 degrees on a meat thermometer, about 25 to 30 minutes.

Grilled Sausages, Onions, and Peppers

Serves 6.

Note: Here's a summer classic. Use the caramelized onions and peppers as a bed for the links. Try the vast variety of sausages in our butcher shops and co-ops — lamb, pork, beef, duck. Serve with mustard and crusty bread. From Beth Dooley.

• 1 lb. mixed bell peppers (red, yellow, orange), seeded and cut into 1-in. strips

• 2 onions, thinly sliced

• 2 tbsp. extra-virgin olive oil, or more if needed

• Coarse salt

• 2 lb. fresh sausages (see Note)

Directions

Heat the grill to medium. Toss the peppers and onions with the oil and sprinkle with the salt. Lightly prick the sausages so they don't burst.

Put the onions and peppers on the grill and cook, turning occasionally, until they're dark at the edges, about 10 minutes, then move to the side of the grill. (Use a grill pan or basket if your peppers and onions are sliced too small.) Place the sausages on the hot side of the grill, rolling to create a nice char, then move to the cooler side of the grill, cover and turn occasionally, until cooked through, about 8 to 10 minutes. Transfer the onions and sausages to a platter and then place the sausages on top.

Beth Dooley is the author of "The Perennial Kitchen." Find her at bethdooleyskitchen.com.

Adblock test (Why?)


from "recipes" - Google News https://ift.tt/QR6TFIN
via IFTTT

Turkish peppers, tomatoes and eggs: how to cook the perfect menemen – recipe - The Guardian

Being good Guardian readers, I’m sure you’re all familiar with shakshuka – the north African egg dish that first conquered Israel, and then brunch menus around the world (with a little help from one Yotam Ottolenghi), but you may be less familiar with the (arguably superior) Turkish version, menemen, for which the eggs tend to be stirred into the sauce, rather than simply cooked on top.

“Quick, simple and tasty,” Ghillie Basan writes in her Classic Turkish Cooking, this chunky, tomato-rich stew is something you’ll find in “bus stations, train stations and ports anywhere there is passing trade”. According to Yasmin Khan, it derives its name from the Greek menemnos, “meaning to ‘flood’ or ‘overflow’”, which, as she observes, “makes sense when you see a pan of menemen with its eggs flooded in juicy, sweet tomatoes, just waiting for you to scrape up with some freshly baked pide ekmek”. But, as Somer Sivrioglu explains, though it’s a famous breakfast dish in Turkey, “no one can agree on the perfect version. It varies from village to village and from house to house – even in the Aegean town called Menemen, which is not necessarily its place of origin.” With that in mind, take today’s recipe as my humble contribution to the debate.

The vegetable base

Sivri biber pepper is used in Ozlem Warren’s menemen. Thumbnails: Felicity Cloake.

Peppers and tomatoes are the soul of this dish – though green pepper haters, who seem to be legion (on social media, at least), will be disappointed to discover that they seem to be the most popular choice, what with Turkey being an enthusiastic consumer of peppers of all shapes and colours, including the long, slim, pale green sivri biber (literally “hot pepper”, though they vary in pungency) called for by Özlem Warren in her book Özlem’s Turkish Table. These are easily found anywhere that caters to Turkish or Balkan communities, though, if you’re averse to heat, you could swap in the paler green carliston peppers suggested by Basan, or the larger, deeper green, flatter bullhorn/romano peppers mentioned by Sivrioglu in Anatolia, which he co-authored with David Dale, though those are usually sold red in the UK.

J Kenji López-Alt allows that most (English language) home recipes call for a green bell pepper, but, he writes, the best menemens are made “with an entirely different type of green pepper: one that’s thinner, less grassy, with a touch more bitterness and a distinct heat.” He lists Japanese shishito, Chinese long, green horned or padrón peppers as decent substitutes for the Turkish sort, only the last of which are available in my local supermarket. (If you can find only bell peppers, you might want to also add a green jalapeño or another mild chilli, for heat, as Basan recommends.)

Yasmin Khan’s menemen is ‘beautifully rich and sweet’.

Khan’s recipe in Ripe Figs, her book on the cooking of the eastern Mediterranean, is the only one I find that calls for a red pepper. It makes her dish beautifully rich and sweet, but I miss the bitter warmth that the green variety brings to proceedings – if you’re less of a fan, however, you may be reassured to know that you have options. I’m more taken with Khan’s generous hand with the tomatoes; she uses six for two people, which is more than double the amount called for in most other recipes. Not only does this give her dish bags of flavour, but it also helps keep it fairly liquid, which is important, because, as far as I can tell, the worst crime a menemen can be accused of is being dry.

The late Jeremy Round cautions readers of his book The Independent Cook not to even consider making this dish with tinned tomatoes, though in fact López-Alt and Basan both allow them as a substitute for the fresh kind. As someone who steers clear of fresh tomatoes for much of the year, I can usually be relied upon to back the tinned sort, but here they’re too jammy and not acidic enough to be a truly satisfactory stand-in, though if that’s all you have available, they are, of course, better than nothing. That said, Warren confirms that “juicy ripe tomatoes work best, [and] if tomatoes [are] on the less ripe side, some folk may also add a bit of tomato paste to give it depth”.

Somer Sivrioglu’s prefers his eggs stirred, not scrambled.

I also rarely bother to peel tomatoes when instructed, but again, because the aim here is to create a sort of egg soup (bear with me), in which the tomatoes have broken down entirely, bits of floating skin could be fairly regarded as a nuisance. Peeling and chopping isn’t much of a faff, but I’ll be honest, it’s easier still to grate them.

Round is the only one who omits onions, with most people going for the yellow sort, with the exception of Sivrioglu, who uses red, and Warren, who calls for spring onions. I’m torn; l love the sweetness of fried onions, but the grassy sharpness of the spring onions appeals to me more at breakfast time. If you prefer the yellow or red ones, then peel, finely dice and add to the pan at the same time as the peppers.

The seasoning

Optional oregano: J Kenji Lopez-Alt’s menemen.

Warren’s spicing is the most minimal; just a couple of teaspoons of Turkish red pepper flakes, also sold as pul biber or aleppo pepper – described by Sue Quinn as “gently fruity, slightly salty red chilli flakes with a soft kiss of heat” in her recent exploration of the impact of ongoing conflict in Syria on its cultivation. If you don’t have any stockists near you, it’s easily found online, but you can, as both Khan and López-Alt suggest, use paprika instead, or the hot chilli flakes that Warren tips as a substitute. It is delicious stuff, though, and well worth seeking out for myriad uses.

Khan and López-Alt both also include oregano, which I like, but which certainly seems to be an optional extra, and Khan garlic, which, while always welcome, isn’t strictly necessary here. (Depending on the ripeness of your tomatoes, you not need the sugar in her recipe either, but taste and see.)

The eggs

Ghillie Basan’s ‘bus station’ menemen.

Interestingly, Basan’s recipe fries the eggs in the sauce, which results in a dish more reminiscent of shakshuka and which one correspondent tells me is known as “bus station menemen”, but I prefer the more common, scrambled version. The trick seems to be to keep the eggs as soft and moist as possible – this isn’t huevos a la mexicana, or even scrambled eggs with peppers and tomatoes, as much as an egg-thickened tomato soup, which means the heat should be low and you should take the pan off before the eggs are done to your taste. Sivrioglu prefers his eggs “stirred not scrambled”, so the white and yolk stay fairly distinct, something also cited as important by Serious Eats and several YouTube videos, but as someone who thinks egg white is always improved by fat, I prefer, like Warren and YouTuber Uncle Hajji, to mix them together. Each to their own, however, so I’ve given both methods below.

López-Alt has some advice for getting “the soft texture just right” – he lifts out half of the base before adding the egg, then stirs it back in at the end, when it will “instantly cool the mixture, preventing the eggs from overcooking”. This is a useful tip if you’re making smaller amounts, because the shallower depth of liquid in the pan will cause it to evaporate faster, though it’s probably unnecessary if you’re cooking for two or more.

The cooking medium, method and extras

Oil, either vegetable or olive, is the most common fat used – and plenty of it for the best results – but Basan, Khan and Warren also use butter for extra flavour. Though optional, if you add it, I’d suggest doing so once the peppers have softened, as in Hajji’s extremely wholesome 13-minute video on the subject, so it doesn’t burn.

Felicity’s hybrid and perfected menemen.

This is one of those recipes where the method is almost more important than the ingredients; it also requires a bit of judgment on your part, because it’s impossible to give precise timings for different pans and stoves. You need to cook down the tomatoes until they create a thick sauce, but not so much that they dry out, or the eggs will cook on the base of the pan instead of poaching in the sauce, and making an entirely different thing. For this same reason, I’d advise using the smallest frying pan you can comfortably fit everything into.

Warren stirs white cheese into her dish, which is a nice idea if you want to bulk it out, particularly as a brunch or lunch dish, while Basan tops hers with a seriously garlicky yoghurt sauce, which, again, may or may not be to your taste at breakfast time.

I don’t think menemen strictly requires any greenery, but a fistful of chopped parsley, which seems most traditional, coriander or chives, as given by Khan as alternatives, certainly won’t do any harm, and will add a pleasing flash of colour. Really, however, the true beauty is in the eating.

Perfect menemen

Prep 10 min
Cook 15-20 min
Serves 2

4 ripe tomatoes, about 200g
About 90g green peppers, preferably a slightly hot variety such as sivri biber or padrón, or a mix of green peppers and 1 mild chilli
2 spring onions, or 1 small onion
2 tbsp vegetable or olive oil
Salt
1 tbsp butter
1 tsp pul biber/aleppo pepper
, or ½ tsp ground paprika
½ tsp dried oregano (optional)
A pinch of sugar (optional)
4 eggs
A little chopped parsley, coriander or chives
, to finish (optional)

Felicity Cloake menemen – grate tomatoes

Cut the tomatoes in half and grate them; discard the skins.

Cut the peppers in half, remove and discard the stems, seeds and pith and white flesh around them and discard, then cut the flesh into thin slices (if your peppers are very slender, you can just slice them, seeds and all). Trim the spring onions and cut both white and green parts into chunky slices (or peel and finely dice the yellow or red onion).

Cut the peppers in half, remove and discard the stems, seeds and pith, then cut the flesh into thin slices (if your peppers are very slender, you can just slice them, seeds and all).

Trim the spring onions and cut both white and green parts into chunky slices (or peel and finely dice the yellow or red onion).

Put the oil in a medium frying pan on a medium-low heat, then saute the peppers, along with a good pinch of salt, and the yellow/red onion, if using, for about five minutes, until soft. Stir in the butter, spring onions, if using, pul biber and oregano, if using, fry, stirring, for a couple of minutes more

Put the oil in a medium frying pan on a medium-low heat, then saute the peppers, along with a good pinch of salt, and the yellow/red onion, if using, for about five minutes, until soft.

Add the tomatoes, plus a pinch of sugar, if you think they’ll need it. Simmer gently until the colour of the tomatoes darkens and some, but not all of the liquid has evaporated.

Stir in the butter, spring onions, if using, pul biber and oregano, if using, fry, stirring, for a couple of minutes more, then add the tomatoes, plus a pinch of sugar, if you think they’ll need it.

Simmer gently until the colour of the tomatoes darkens and some, but not all of the liquid has evaporated.

Meanwhile, crack and beat the eggs, unless you’d prefer to keep the two parts separate, in which case crack them whole into the pan and stir them only a little to break the yolks without scrambling them.

Meanwhile, crack and beat the eggs, unless you’d prefer to keep the two parts separate, in which case crack them whole into the pan and stir them only a little to break the yolks without scrambling them.

Stir (or crack) in the eggs and cook, stirring, until the mixture has firmed up slightly, but not entirely. Top with herbs, if using, and serve with fluffy bread.

  • Menemen: though breakfast shouldn’t be a competition, is it, in fact, the best egg dish going – and if so, what’s your perfect version? And what other personal or regional variations are worth a try?

Adblock test (Why?)


from "recipes" - Google News https://ift.tt/rksDymZ
via IFTTT

Monday, May 22, 2023

Rachel Roddy’s recipe for oat-and-raisin biscuits - The Guardian

“Would you like a biscuit?” Twice a day, mid-morning and mid-afternoon, Veronica pushed her trolley down the corridor and around the various departments serving tea, coffee and biscuits. Along with the boardroom drinks cabinet and stationery cupboard, Veronica was the best thing about Dad’s work. Despite manoeuvring a not-small trolley covered with warm cups and pots of boiling water, she seemed to move with more ease than anyone else in the building. Welcome everywhere, she knew everyone and what they needed, be that strong tea with milk and one sugar, or black with two pills of sweetener and a chocolate digestive.

While it was communal, the small kitchen was Veronica’s, and immaculate. She took the tea towels home, and made sure the biscuit tins were always full. When we visited as kids, those tins were hugely important. Like my grandma’s tin, they were filled with different combinations of the good ones: chocolate digestives, plain digestives, custard creams, bourbons, ginger nuts (Dad’s favourite, and not only because he, too, was ginger). I want to remember Hobnobs, too, which launched in 1985, the same year as EastEnders and the Anglo-Irish agreement. And then there was the delicious story about someone in accounts who, working late, would eat the contents of an entire tin.

Our own biscuit tin fell off the top of the fridge a few weeks ago, but the dent means it now closes better. Decades later, and 2,000 miles from Hemel Hempstead, I keep it filled with a good selection of Italian and English biscuits. They are usually bought, but occasionally homemade, in which case there is a good chance they will be from Biscotti: Recipes from the Kitchen of the American Academy in Rome, written by the head chef at the time, Mona Talbott, and the Sicilian pastry chef Mirella Misenti. Each of the 62 recipes begins with a short introduction, often mentioning where the biscuit fits into academy life: suitable for breakfast; a pleasing bite with coffee; as part of afternoon tea (the afternoon biscuit plate is a serious business); for scooping up pudding.

Then there are several biscuits with specific roles: the iced ginger biscuits served after the Christmas play; the chocolate meringues that get whipped up for someone’s birthday; Friday night chocolate cookies; and these oat-and-raisin biscuits “often packed in picnics for a fellow to take to their studio when working intently on a project, or visits to archaeological sites”.

Quite the recipe note, or maybe I am too easily influenced, but I fully believe that oat-and-raisin biscuits will help me work more intently, or sustain me when I do eventually visit an archaeological site. Until then, they sustain me through the morning; a cross between a flapjack, Hobnob and Mulino Bianco multi-cereal, and dead easy to make. Now, I’ll be Veronica and put the kettle on. “Would you like a biscuit?”

Oat-and-raisin biscuits

Makes 20-24

100g raisins, soaked in 100ml warm tea (any will do – I use Yorkshire) for 15 minutes
100g butter
, at room temperature
100g caster sugar
1 egg
1 tbsp golden syrup

1 tbsp treacle
120g plain flour
, plus extra for dusting
100g rolled oats
Salt
1 tsp cinnamon

While the raisins are soaking, cream the butter and sugar in a large bowl, then beat in the egg, syrup and treacle. Drain and squeeze the raisins, then add them to the bowl with the flour, oats, a pinch of salt and the cinnamon and work the mixture until it comes together into a sticky ball.

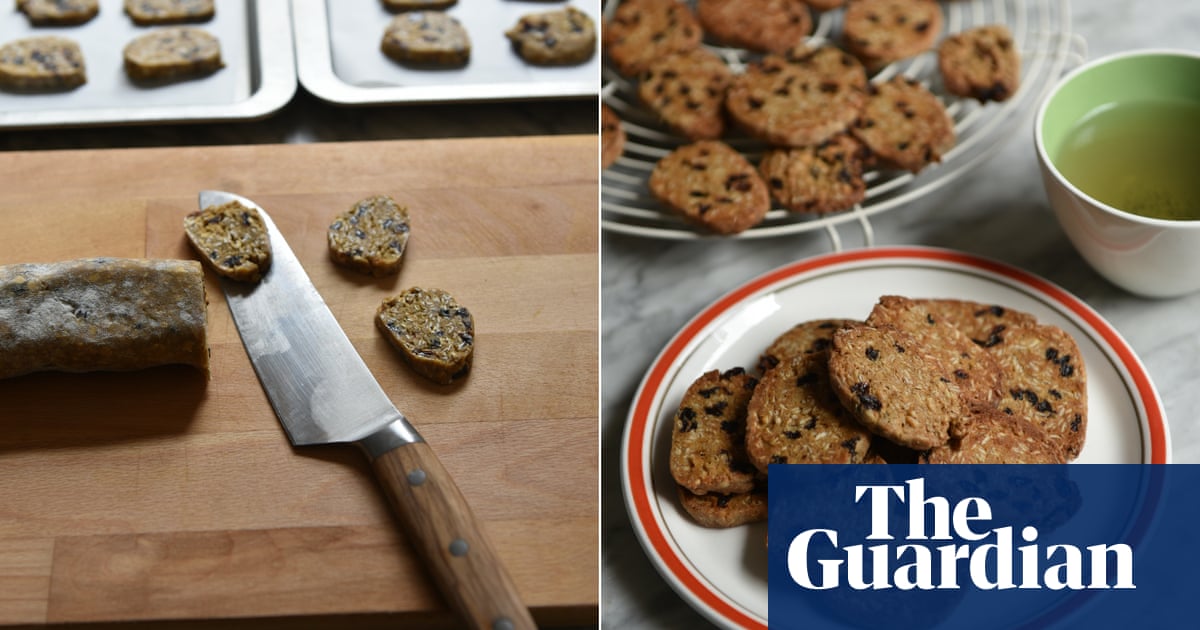
With floury hands, break the dough mixture in two and roll each half into a log about 10cm long and the radius of a small biscuit. Wrap and chill for at least two hours (and up to a month).

Heat the oven to 180C (160C fan)/350F/gas 4 and line a baking tray. Using a sharp knife, cut the logs into 5mm-thick rounds and arrange these on the tray, spacing them well apart. Bake for 10-12 minutes, until the edges are golden, then remove and leave to cool on the tray before lifting.

Adblock test (Why?)


from "recipes" - Google News https://ift.tt/G8Pgw53
via IFTTT

Saturday, May 20, 2023

Hummingbird bread loaded with bananas, pineapple, coconut and pecans: Recipe - Fox News

This delectable riff on classic hummingbird cake is finished off with a drizzle of delicious cream cheese glaze.

"All the flavors of Hummingbird Cake —bananas, pineapple, coconut and pecans—are in this bread," Pam Brand, co-founder of food blog Biscuits and Burlap told Fox News Digital.

"Consider it a smaller, slightly less sweet version of that southern favorite. The cream cheese glaze brings to mind the traditional cake frosting, but without being overpoweringly sweet and rich."

BROWN BUTTER CINNAMON STREUSEL COFFEE CAKE: TRY THE RECIPE

Get Brand's recipe below.

hummingbird bread

Take a look at this Hummingbird Cake filled with bananas, pineapple, coconut and pecans. (Pam Brand of Biscuits and Burlap)

Hummingbird Bread by Biscuits and Burlap

Makes 12 servings

Prep time: 12 minutes

Cook time: 35 minutes

STRAWBERRY FRENCH TOAST CASSEROLE: TRY THE RECIPE

Ingredients: 

For the Bread

⅓ cup butter at room temperature

1 egg at room temperature

2 ripe bananas mashed

½ cup sugar

¼ cup brown sugar

hummingbird bread split

This delicious cake is filled with crushed pineapple, chopped pecans and dried pineapple which is sure to please your summer crowds. (iStock)

1⅔ cup self rising flour

½ cup shredded, dried coconut

⅔ cup crushed pineapple not drained

½ cup chopped pecans

1 teaspoon vanilla extract

ORANGE ANGEL FOOD CAKE: TRY THIS EASY DESSERT RECIPE

For the Cream Cheese Glaze

1 ounce cream cheese at room temperature

1 cup powdered sugar

1 tablespoon milk

¼ teaspoon vanilla extract

Directions: 

pouring bread batter

This hummingbird cake has a banana batter base that is reminiscent of the classic banana bread. (iStock)

For the Bread

1. Cream butter at low speed of mixer.

2. Add sugars and cream for about 1 minute.

3. Add bananas, egg and vanilla extract and cream for about 1 minute.

4. Stir in flour, pineapple and coconut until well blended. Fold in pecans.

5. Pour batter in a parchment paper lined 9 inch loaf pan which has been oiled and floured or sprayed with baking spray.

6. Bake at 350 °F for 35–40 minutes or just until a toothpick inserted in the middle comes out clean.

CLICK HERE TO SIGN UP FOR OUR LIFESTYLE NEWSLETTER

For the Glaze

1. Blend all ingredients until smooth.

2. Heat in the microwave for 20–30 seconds or until pourable.

3. Cool slightly and then drizzle over cooled bread.

CLICK HERE TO GET THE FOX NEWS APP

This original recipe is owned by biscuitsandburlap.com and was shared with Fox News Digital.

Adblock test (Why?)


from "recipes" - Google News https://ift.tt/2dJ0zLF
via IFTTT

Friday, May 19, 2023

The Best Freezer-Friendly Recipes, According to Eater Staff - Eater

We like to think of the freezer as a way to maximize our efforts in the kitchen. Big-batch recipes? Make the whole thing — you’ll be thankful for any extras in a few weeks when you need a quick dinner or late-night snack. A baked good that’s somewhat involved? The work goes by easier when you think about it in the context of future treats that need only to be pulled out of the freezer. From freezer-friendly muffins to an always-satisfying lasagna, take this as your inspiration to stuff the freezer full of goodness and make life easier for your future self. (From there, here’s your guide on how to defrost everything.)

Slow Cooker Curried Lentil Soup

Lentil soup is one of those perfect foods for me. It’s soothing, hearty, and works well for lunch, dinner, hangovers, and upset stomachs; you can mix in whatever you want (my new go-to is chunks of whatever cheese I have available, Impossible nuggets, a ton of hot sauce, and a drizzle of olive oil). I tend to make lentil soup in my slow cooker because it’s easy and the house smells so good. And the dish is an ideal freezer food because all you have to do is portion out the soup into little deli containers and thaw/microwave when needed. —Nadia Chaudhury, Editor of Eater Austin

Cajun Gumbo With Chicken and Andouille Sausage

Gumbo is a commitment anytime you make it (and most recipes tend to make a lot), so I always like to freeze half of it as a gift for Future Me. It’s one of those foods that doesn’t quickly deteriorate in the freezer, and recipes without seafood are even less delicate. Enter this excellent version for chicken and andouille gumbo from Serious Eats. The roux is admittedly time-consuming, but there are instructions included on how to make the process less hands-on. You’ll be rewarded with a dark, savory gumbo undiluted by tomato — and plenty of it to store for later. —Missy Frederick, Cities Director

Classic Easy Lasagna

When our upstairs neighbors had their first baby earlier this year, my girlfriend and I brought them a massive tray of lasagna. Ditto when multiple friends got COVID-19, and after another friend’s wedding. On nights when we don’t feel like cooking for ourselves, we open up the freezer and chisel off a couple of servings from our own frozen stash, like hungry ice sculptors, and within minutes we’re eating a meal that somehow tastes even better than it did the day we cooked it.

The way homemade lasagna reheats is a thing of magic. The sauce and the cheese, after hibernating for days, weeks, or even months with the pasta sheets, creates a depth of flavor that doesn’t exist in fresh lasagna. The ingredients fuse together, making every bite the right balance of salty, sweet, and cheesy. Just throw a frozen brick into the microwave until it’s almost thawed and then put it in the oven at 400 degrees for a few minutes, until the edges are crispy, and forever transform your perception of freezer food. —Jonathan Smith, Interim Eater.com Editor

Cheddar-Scallion Biscuits

The best way to eat a biscuit, in my opinion, is still-steaming warm and fresh. That being said, I find that most biscuit recipes yield too many for myself and my partner to eat in one sitting, leaving leftovers that are never as good. Luckily, my favorite biscuit recipe, which comes from Daybird chef Mei Lin, freezes perfectly.

Lin’s recipe — which is, blessedly, adaptable to all sorts of cheeses, herbs, and inclusions — calls for freezing the cut biscuits for 30 minutes before baking to ensure the flakiest layers. From there, I’ll pull however many I want to bake for brunch and then let the rest firm up a little longer, before putting them in a reusable freezer bag. In a nice hack to quickly satisfy biscuit cravings anytime, I’ve found that I can cook just one or two frozen biscuits in the air fryer. —Bettina Makalintal, Senior Reporter at Eater.com

Morning Glory Muffins

I first started freezing muffins for my sister-in-law when she had her second kid, squirreling away batches in Ziplocs for the bleary-eyed days and nights of infant care when you just need easy carbs. Since then I’ve learned frozen muffins can be a lifesaver for anyone, caregiving or not, in need of a one-and-done, anytime meal or snack. Freezing works with many muffins, but you can’t go wrong with classic morning glory muffins, packed with carrots, apples, or whatever mix-ins you prefer. You can still dig up the original 1981 recipe from Gourmet, but the version by King Arthur is more accessible and totally unimpeachable. —Nicholas Mancall-Bitel, Travel Editor

Lemon Crinkle Cookies

Because my household is just two people, baking an entire batch of cookies is usually a waste. By the time we can eat all of them, they’re stale and lackluster. Enter the freezer. Every couple of months, I’ll make a batch of peanut butter-miso or lemon crinkle cookie dough, then scoop the dough into individual balls onto a cookie sheet, and allow them to freeze until firm. Then, you can put the cookies into a freezer bag — I usually write the baking instructions on the bag with a Sharpie — and stick them in the freezer until a sugar craving strikes. Not only do I waste less cookie dough this way, but I also can have a couple of warm, freshly baked cookies whenever I damn well please. —Amy McCarthy, Staff Writer at Eater.com

Adblock test (Why?)


from "recipes" - Google News https://ift.tt/rwL6tql
via IFTTT

How to turn old, floury apples into a glorious spiced fruit butter – recipe - The Guardian

When I was growing up as a vegetarian teenager, I discovered my love of whole foods from healthfood shops which, back in the 1970s usually had a wonderfully complex aroma of spices, whole grains, nuts and seeds. Shelves lined the walls from floor to ceiling, all full of ingredients from the mainstream to the obscure. One product I came across back then was apple butter, a creamy, apple jam with a wonderful texture that I presume was the result of the natural pectin in the apples. It is a rare find these days, but fortunately it’s very easy to make, and stores well, too, preserving floury, past-their-best apples for a rainy day.

Maple apple butter

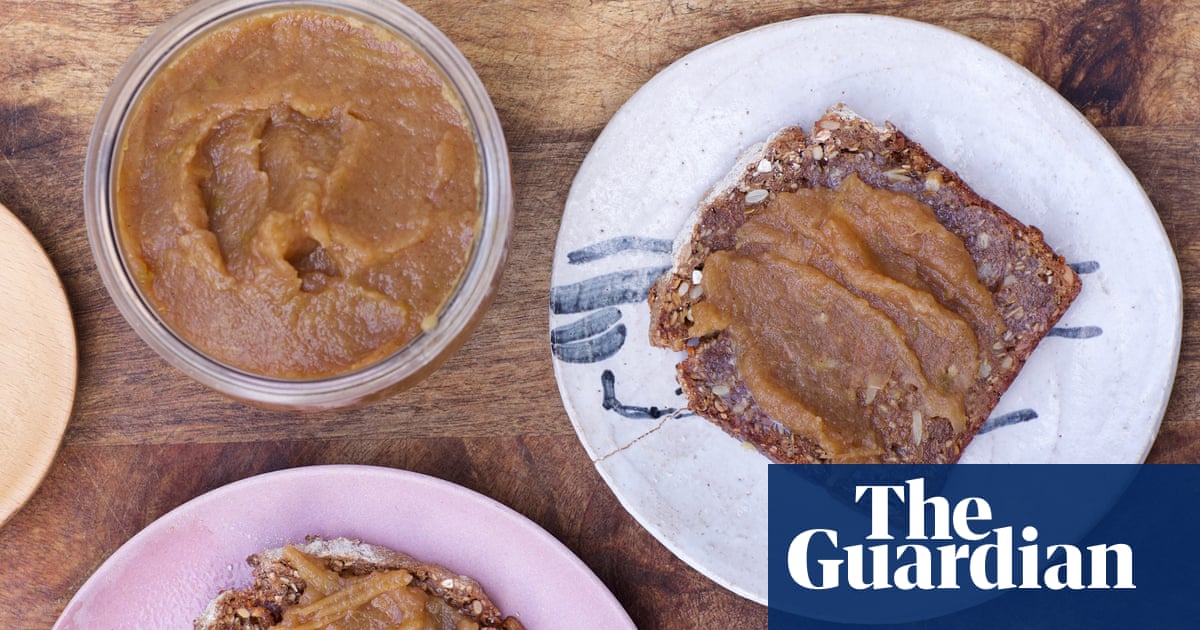
According to the government waste scheme Wrap, we throw away around 800,000 apples in the UK every day. By this time of year, home-grown apples can often be a bit iffy, because they’ve been in storage since late autumn and can therefore have turned floury and have a short shelf life. Apple butter is a great way to transform a bad batch or glut of reduced-price apples into something truly delicious. This thick puree stores well and is impressively versatile. Simply spread on toast, serve as a condiment alongside roast chicken, pork or potatoes, use it to flavour cocktails or even to fill homemade pastries or doughnuts.

In the US, people often flavour apple recipes with a pre-made apple pie spice mix, and here’s a rough guide to making your own. Mix a teaspoon of ground cinnamon, a quarter-teaspoon of ground nutmeg, an eighth of a teaspoon each of ground allspice and ginger, and a pinch of ground cloves; other spices you could add are ground turmeric, star anise, cardamom, mace and even a careful pinch of black pepper if you want some heat.

Makes About 500ml

1kg apples
150ml apple cider vinegar
1 tsp vanilla extract
1 tsp sea salt

2 tsp cinnamon (or American-style apple pie spice mix – see recipe introduction)
100ml maple syrup, 100g unrefined brown sugar, such as rapadura

Cut the unpeeled apples into large chunks, then remove and compost the cores and any bruised bits, or use them to make apple cider vinegar. Tip the diced apples into a heavy-based pan with the apple cider vinegar, vanilla extract, sea salt, cinnamon (or apple pie spice mix) and 180ml water, then bring to a boil. Turn down the heat to a strong simmer, half cover the pan and cook, stirring occasionally, for about 40 minutes, until reduced by half. Take off the lid, turn up the heat a touch, add the maple syrup and reduce for 20 minutes more, until the mixture turns thick and dark brown, and holds its shape when you stir it.

Pour into a clean 500ml jar, seal and store in the fridge for up to a month, or freeze in smaller portions for up to a year.

Adblock test (Why?)


from "recipes" - Google News https://ift.tt/KOVL8qD
via IFTTT

Recipe: Strawberry Hibiscus Cardamom Hand Pies - San Francisco Chronicle

Come May, I start using all the spring and summer fruits to make hand pies. Today I am sharing a Strawberry Hibiscus Cardamom Hand Pie — with the flakiest homemade pie crust and a sweet-tart filling made with fresh strawberries, dried hibiscus and ground cardamom.

Strawberries are popping up everywhere right now. They last until October, which is absolutely bliss for me, as they are one of my favorite fruits. Growing up in Mumbai, strawberry season was short lived — barely two months in a year.

Strawberries invoke all kinds of memories for me. My fondest is of my mom giving us in-season strawberries and whipped cream as dessert. She would make strawberry ice cream, strawberry milk shakes and simple vanilla cakes with fresh strawberries on top.

When my kids were in their peanut butter-and-jelly sandwich years, their favorite jam was none other than strawberry — not store-bought, but homemade. I loved playing around with flavors: I would make strawberry chocolate jam, strawberry rose (my favorite combination!), strawberry cardamom and strawberry hibiscus.

Strawberry Hibiscus Jam is one of my most popular flavors. When made with in-season strawberries that are sweet like candy, combined with dried hibiscus, which imparts a tart flavor, it is simply sublime. (You can find the recipe in my cookbook, “Mumbai Modern.”)

Hibiscus is an annual herbaceous plant that grows hibiscus flowers, which are shaped like a trumpet. They come in various colors, but the signature color that I grew up with was a stark, bright red that can paint drinks an almost neon pink. You can find dried hibiscus online or at a Mexican grocery store. 

These hand pies start off with a simple compote made with strawberries, dried hibiscus, sugar, lemon juice and a bit of cornstarch. I also add ground cardamom to lend a floral note. The compote is completely cooled in the fridge before we form the hand pies.

For the pie dough, I add apple cider vinegar and ice-cold water to flour and bits of butter. Those bits of butter, when melted, create air pockets, resulting in a flaky dough. I learned this trick many years ago when I took an extensive pie class from the now-closed Tante Marie’s Cooking School in San Francisco. 

The dough and unbaked hand pies frequently go into the refrigerator or freezer so that they can be handled more easily. Egg wash is used inside to seal and on top for a beautiful golden brown crust.

Once baked and cooled, the hand pies are given a drizzle of strawberry icing, thus enhancing the strawberry flavor. It’s made with freeze-dried strawberry powder; you can buy it online or make your own by pulverizing freeze-dried strawberries in a blender. 

If you want to simplify the recipe, you can use a basic powdered sugar icing instead, or even skip the icing entirely in favor of a sprinkling of turbinado sugar. Similarly, the decoration is optional, but how can anyone resist a pretty pink pastry with sprinkles on top?

Reach Amisha Gurbani: food@sfchronicle.com

Consider the strawberry icing and sprinkles optional. You could also sprinkle turbinado sugar on the egg wash instead.

Consider the strawberry icing and sprinkles optional. You could also sprinkle turbinado sugar on the egg wash instead.

Amisha Gurbani/Special to The Chronicle

Strawberry Hibiscus Cardamom Hand Pies

Makes 10 hand pies

These hand pies start with the flakiest homemade pie crust, which is filled with a sweet and tart filling featuring in-season strawberries, hibiscus and floral cardamom. Make them pretty and fun with strawberry icing and sprinkles. If you’d rather simplify the recipe, you could also sprinkle turbinado sugar on top of the egg wash right before baking to give the crust a sugary crunch!

Strawberry compote:

2 heaping cups strawberries, washed and cut into small pieces

1 tablespoon lemon juice

¼ cup granulated sugar

2 tablespoons dried hibiscus

1½ tablespoons cornstarch

½ teaspoon ground cardamom

Pie dough:

2¾ cups all-purpose flour, plus extra for rolling the dough

1 teaspoon ground cardamom

1 teaspoon table salt

1½ tablespoons granulated sugar

1 cup unsalted butter, cold and cut into small cubes

¾ cup ice-cold water

½ cup ice cubes

1 tablespoon apple cider vinegar

Egg wash:

1 egg

2 teaspoons water

1 teaspoon granulated sugar

To finish:

1 cup powdered sugar

2 tablespoons freeze-dried strawberry powder

½ teaspoon vanilla extract

2-3 tablespoons whole milk

Sprinkles (optional)

Make the strawberry compote: In a medium bowl, mix together all of the ingredients with a rubber spatula. Let sit, covered, for about 30 minutes.

Empty the bowl of ingredients into a medium saucepan set on medium heat. Mix to combine and bring to a boil, stirring occasionally. Boil for about 5 to 7 minutes, until the mixture looks thick. 

Let the mixture cool completely before putting in an airtight container. Place in the fridge for at least 4 to 6 hours.

Make the pie dough: In a large bowl, whisk together the flour, cardamom, salt and sugar. Add the cold butter and, with a pastry blender or your fingers, cut the butter until the chunks are pea-sized and coated in flour. 

In a medium bowl, mix the water, ice and apple cider vinegar. Add 2 tablespoons of this cold water mixture to the flour mixture using the pastry blender or your hands to mix. Continue adding 2 tablespoons of the cold liquid at a time until the dough just starts to come together. (You’ll still see butter pieces, which will make the dough flaky.) You should need up to 10 tablespoons total. If you need to add a bit more water to get it to come together, add in 1-tablespoon increments, but be careful: If you add too much water, the dough will become soggy. 

Divide the dough into two equal parts. Wrap each portion in plastic wrap. Pat and shape the dough to form neat rectangles, about 5 by 6 inches in size each. Refrigerate for 1 hour.

Roll out the dough: Take one rectangle of dough out of the fridge. Dust a work surface with flour. Unwrap the dough and roll it out roughly into an 11-by-14-inch rectangle with a thickness of ⅛ to ¼ inch. Sprinkle the surface and the rolling pin with additional flour to ensure that it does not stick. 

Using a ruler and a sharp knife, trim the rough edges to form a smooth rectangle. Set the trimmings aside.

Cut the dough lengthwise in 3-inch sections. Then cut it across widthwise in 3½-inch sections to get 8 pieces. The final hand pies will be 3-by-3½ inches. 

Place the pieces of dough on a parchment-lined baking sheet and place in the freezer for 10 minutes.

Repeat the cutting and chilling process for the second rectangle of dough.

Collect all of the scrap pieces of dough and wrap in a plastic wrap. Form a rectangle and refrigerate for 30 minutes. You’ll return to these scraps later to make 2 more pies.

Make the egg wash: In a small bowl, whisk together the egg, water and sugar until well combined.

Form the hand pies: Remove the first baking sheet from the freezer. Using a pastry brush, brush the edges of each rectangle (about ½ inch all around) with the egg wash.

Spoon about 1 to 1¼ heaping tablespoons of the filling in the center of each pie, leaving a ½- to ¾-inch gap around the filling.

Remove the second baking sheet from the freezer, and place each piece gently on top of a rectangle with filling. Use your fingertips to gently press around the filling to seal the pie. Using a fork, press the edges of the pie to make a pattern and further seal the pie. Brush the top of each pie with egg wash.

Use a spatula to place the pies on a baking sheet and freeze until ready to bake.

Take the scrap dough from the fridge. Roll it out into a rectangle with a thickness of ⅛ to ¼ inch, and cut into 4 rectangles. Repeat the steps of filling and forming pies, applying egg wash on top, to form 2 additional hand pies. Place on the same baking sheet as the other pies and freeze for an additional 10 minutes.

Meanwhile, preheat the oven to 375 degrees.

Remove the pies from the freezer and apply one more layer of egg wash to the tops. Cut an X with a sharp knife in the middle of the top layer of dough of each pie so that steam can escape while it bakes. Bake for 30 minutes, or until golden brown in color.

Remove from the oven, transfer to a wire rack and let cool completely.

Decorate the pies: In a medium bowl, whisk together the powdered sugar, strawberry powder, vanilla extract and milk until it is a thick yet spreadable consistency. 

Spread about 2 teaspoons of icing on each pie and decorate with some sprinkles, if using. Let the pies sit for 30 minutes so the icing sets. Serve.

Store leftovers in an airtight container for up to 2 to 3 days.

Adblock test (Why?)


from "recipes" - Google News https://ift.tt/G0ZwFIX
via IFTTT

'Dump and Go' Slow Cooker Recipes for Your Easiest-Ever Weeknight Suppers - Yahoo Life

It’s no secret we’re big fans of the slow cooker — anything that makes getting dinner on the table easier is a huge win in our books. And fo...